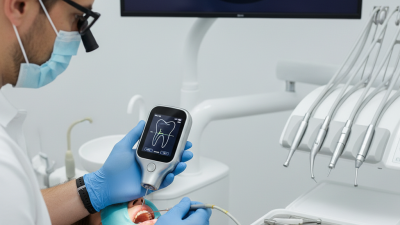
Using an electronic apex locator correctly requires more than connecting a file and reading a number. It demands careful isolation, clear access, and a stable working environment. This guide introduces practical apex locator use for clinicians, students, and dental professionals seeking more predictable endodontic measurements.
A dry rubber dam field matters. Saliva, blood, metallic restorations, and loose contacts can distort the signal. After preparing the access cavity, connect the lip clip securely and place the file without forcing it. Advance slowly. Watch the display, but also notice changes in resistance and patient comfort. A sudden “apex” reading may reflect a wide canal, perforation, or fluid pathway rather than the true apical position.
Reliable practice combines electronic measurements with clinical judgment and appropriate radiographic verification. Manufacturers may use different displays, sounds, and calibration requirements, so their instructions deserve attention. Evidence supports modern apex locators, but no device removes the need for anatomical knowledge. Even experienced clinicians can misread an unstable signal.
Small details matter.
This article will explain how to prepare the tooth, select a suitable file, interpret changing readings, and manage common errors. It will also examine when a measurement should be repeated or questioned. The goal is not to chase a perfect screen reading. The goal is to establish a defensible working length that respects the canal anatomy and supports safe cleaning, shaping, and obturation. Still, clinical conditions vary, and a careful operator must remain willing to pause, reassess, and correct an earlier assumption.
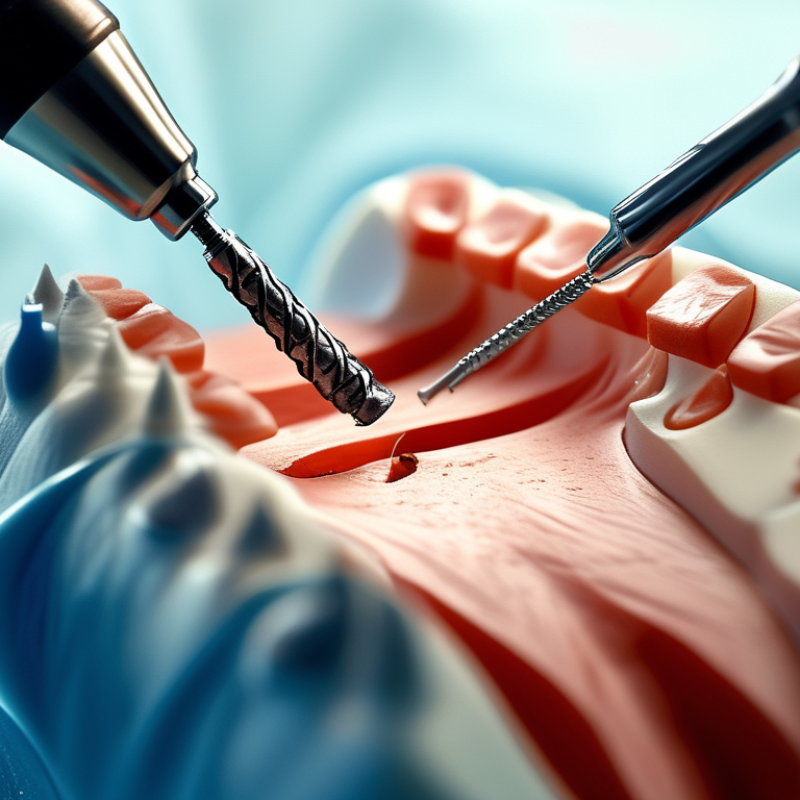
Accurate apex-locator readings begin before the file enters the canal. Remove the rubber dam’s saliva, blood, and irrigant from the chamber. A dry access cavity improves electrical control. The canal itself should remain moist, not flooded. This balance matters.
The American Association of Endodontists recommends establishing a reproducible glide path before working-length measurement. Use a small, pre-curved hand file that reaches the estimated length without force. Confirm the file fits snugly. A loose file can produce unstable readings. A 2021 systematic review in the Journal of Endodontics found electronic apex locators reached approximately 82%–100% accuracy within 0.5 mm, depending on device generation and testing conditions. That range is useful, but it is not a promise.
Check the locator’s lead, lip clip, and file contact before measurement. Keep the patient’s metal restorations away from the file and clip. Advance slowly while watching the display and listening for sudden changes. Stop near the “apex” signal, then verify the length with a radiograph when anatomy appears complex. The European Society of Endodontology’s quality guidance supports combining electronic measurements with clinical and radiographic findings.
Do not trust one dramatic beep.
In my experience, repeated readings are more valuable than speed. If two measurements differ by more than 0.5 mm, reassess moisture, file binding, perforation risk, or apical patency. I sometimes repeat the measurement after irrigation, because the first reading may reflect contamination rather than anatomy. That extra minute can prevent over-instrumentation.
Correct apex-locator use begins with a clean, controlled access cavity. Select a small hand file that reaches the canal smoothly without binding. A loose file can produce unstable readings. A file that is too large may stop before the apical constriction. In my clinical experience, a reproducible glide path matters more than forcing the file deeper. Keep the chamber free from blood, saliva, and excess irrigant. Dry only the chamber, not the entire canal. The file must contact the canal walls, while the lip clip maintains contact with the patient.
Stable electrical contact is essential. Attach the file clip firmly to the metal shaft, away from the rubber stopper. Check that the clip does not touch the access cavity, clamp, or another metal restoration. A 2021 systematic review in the Journal of Endodontics reported that electronic apex locators identified the apical foramen within ±0.5 mm in approximately 90% of tested cases, although results varied by device and canal condition. This is useful evidence, not a guarantee. Curved canals, perforation, open apices, and conductive fluids can still mislead the display.
Tips: Irrigate gently, then remove pooled liquid from the chamber. Advance the file slowly. Watch for a stable reading, not a single flashing number. Repeat the measurement after repositioning the file. I sometimes want to trust the first signal. That is a mistake worth questioning. Confirm the reading with a working-length radiograph when anatomy appears uncertain. Record the file size, reference point, and measured length immediately.
How to Use an Apex Locator Correctly?
Taking the working-length reading begins with a clean, visible access cavity. Isolate the tooth with a rubber dam, then remove excess fluid from the chamber. Do not leave it completely dry. A slightly moist canal often provides a more stable electrical pathway. Check the file size before measuring. A loose file may produce an uncertain reading.
Attach the lip clip securely to the patient’s cheek. Insert a suitable hand file until the display approaches the apical position. Advance slowly, using gentle finger pressure. Watch the file, not only the screen. If the reading changes suddenly, stop and inspect the canal. Debris, a side canal, an open apex, or a perforation can mislead the measurement. Preflaring may improve file control and reduce binding. It may also change the measured length, so reassessment is sensible.
Take the reading when the file moves freely and the signal remains stable. Mark the file at the reference point, then verify the length with a periapical radiograph when anatomy is unclear. Curved roots need extra caution. Metal restorations and excessive moisture can interfere with the signal. I have found that rushing this step creates more problems than a careful repeat. The displayed number is helpful, but it is not a substitute for clinical judgment. Even a stable reading deserves reflection when the canal feels unusual.
Taking the Working-Length Reading with the Apex Locator
An apex locator provides a useful electrical estimate, not an unquestionable endpoint.
Dry the access cavity, control bleeding, and insert a small file until the display indicates the apical position. Then withdraw slightly to establish the working length. Keep the file stable.
Evidence must confirm the number. A 2021 systematic review reported that electronic devices measured within ±0.5 mm of the apical foramen in approximately 75–95% of cases, depending on the device and testing conditions. The variation matters. Immature apices, resorption, perforation, severe moisture, and unusual canal anatomy can reduce reliability. One reading is not enough.
Take a confirming radiograph with the file positioned at the proposed length. Compare the file tip with the root end, periodontal ligament outline, and nearby anatomical structures. European endodontic guidance supports combining electronic measurement with radiographic assessment. Clinically, tactile resistance and paper-point moisture also provide valuable clues.
A paper point that emerges beyond the suspected endpoint may reveal an overextended measurement. A dry point does not prove perfect control.
I have seen apparently stable readings change after bleeding was managed or the file was repositioned. Recheck questionable cases, document both measurements, and adjust conservatively. Radiographs have limitations too, especially when roots overlap or curve buccolingually.
Assume uncertainty when the evidence conflicts.
How to Use an Apex Locator Correctly?
An apex locator is helpful, but its display is not a guarantee. A systematic review in the Journal of Endodontics reported accuracy rates of approximately 82.5% to 96.2% within 0.5 mm of the apical foramen. Results varied with canal conditions and device design. That range matters. A small error can change working length, especially in narrow or curved canals.
Moisture control is critical. Excess irrigant in the pulp chamber may create a false signal, while a completely dry canal can produce unstable readings. Blood, metal restorations, perforations, and open apices may also confuse measurement. I usually remove fluid from the chamber, keep the file loose, and repeat the reading after gentle irrigation. Do not force the file. Never trust one beep.
A stable reading should agree with tactile feedback and a confirmatory radiograph. The American Association of Endodontists emphasizes combining electronic measurements with clinical and radiographic findings. If the signal jumps between numbers, pause and inspect the setup. The file may be touching a metallic restoration, or the clip may be poorly connected. I have also seen readings change after replacing a loose file. That was not the instrument’s fault.
Some cases remain difficult. Calcified canals, resorption, and immature roots reduce confidence. In those situations, record the uncertainty and reassess the length during preparation. Accuracy is a process, not a single screen value.
| Measurement Situation | Likely Cause of an Unreliable Reading | Typical Reading Pattern | Recommended Correction | Prevention and Verification |
|---|---|---|---|---|
| Canal is flooded with sodium hypochlorite or another conductive irrigant | Excess liquid can create an electrical pathway through the pulp chamber or across the tooth surface, causing leakage current. | The file may appear to reach the apex too quickly, show unstable movement, or give an over-instrumentation warning. | Remove excess irrigant from the chamber with a cotton pellet or aspiration. Keep the canal moist, but avoid a visibly flooded access cavity. | Maintain a controlled irrigant level and repeat the measurement after drying only the chamber, not desiccating the canal. |
| Canal is excessively dry | Insufficient moisture may reduce conductivity, particularly in narrow canals or when the file has limited contact with dentin. | The display may fluctuate, fail to advance normally, or indicate a position shorter than expected. | Moisten the canal with a small amount of compatible irrigant and recheck the working length. | Use a consistent irrigation and drying protocol rather than alternating between a flooded and completely dry canal. |
| File contacts a metal restoration, crown, or clamp | The file may complete an unintended electrical circuit through conductive metal. | The reading may jump suddenly toward the apex or remain erratic when the file touches the restoration. | Prevent contact between the file and metal. Improve isolation and reposition the lip clip if necessary. | Inspect the access cavity, rubber dam, file holder, and lip clip before accepting the measurement. |
| Lip clip has poor contact | A dry, contaminated, or poorly positioned lip clip can interrupt the circuit. | No signal, intermittent readings, or a display that changes when the patient or clip moves. | Place the clip securely on moist oral mucosa away from the operative field. Clean or replace contaminated accessories according to the device instructions. | Confirm a stable connection before inserting the file and repeat the electronic test if available. |
| Open apex, root resorption, perforation, or apical foramen is unusually wide | The electrical transition may be less distinct because the apical anatomy does not provide a predictable constriction. | The reading may be unstable, longer than expected, or difficult to reproduce. | Interpret the reading with radiographic and clinical findings. Do not rely on a single electronic measurement. | Use multiple file positions and confirm the working length with a suitable radiograph when anatomy is uncertain. |
| Canal contains conductive debris, pulp tissue, or excessive exudate | Debris or fluid can create a false electrical pathway and interfere with file progression. | The reading changes repeatedly or differs substantially between file sizes. | Irrigate, recapitulate gently with a small hand file, and remove loose debris before measuring again. | Establish a reproducible glide path and avoid forcing the file apically. |
| File is too small or poorly engaged in the canal | Limited dentinal contact can make the electrical signal less stable, especially in a wide or irregular canal. | The display fluctuates or gives different results with minor file movements. | After creating a safe glide path, repeat the measurement with a file that fits the canal without binding. | Use a consistent file size and compare the reading with tactile sensation and canal anatomy. |
| File is bent, damaged, or contaminated | Damage can alter file handling, while debris or insulating material may affect electrical contact. | Readings are inconsistent and the file does not follow the canal smoothly. | Clean or replace the file. Never force a file that binds or appears deformed. | Inspect the file before use and follow the manufacturer’s instructions for reuse and replacement. |
| Apical patency is blocked by debris or a ledge | The file cannot reach the apical region, so the displayed position reflects the obstruction rather than the true canal endpoint. | The reading remains short and stops at a similar level despite gentle advancement. | Do not force the file. Irrigate, use gentle watch-winding with a small hand file, and reassess the canal path. | Compare with preoperative imaging and tactile findings; seek specialist assessment if patency cannot be safely restored. |
| Perforation or communication with the periodontium is suspected | The file may contact periodontal tissues before reaching the natural apical endpoint. | The device may indicate the apex at an unexpectedly short level, often with bleeding or an unusual tactile sensation. | Stop enlarging the suspected path and confirm with angled radiographs and clinical assessment. | Use careful access preparation, preoperative imaging, and gentle negotiation in curved or calcified canals. |
| Electronic reading conflicts with the radiograph or tactile findings | Possible explanations include canal curvature, unusual apical anatomy, incorrect reference point, unstable contact, or an additional canal. | The measured length is not reproducible or does not correspond to the expected root anatomy. | Recheck isolation, connections, irrigant level, file fit, and coronal reference point. Then repeat the measurement. | Use the apex locator as part of a combined assessment rather than as the only source of working-length information. |
| Device, cable, file clip, or battery has a technical problem | Low power, damaged cables, loose connectors, or contaminated clips can interrupt or distort the circuit. | The unit gives no signal, repeated error alerts, or abnormal readings in more than one tooth. | Check the battery, connectors, accessories, and operating mode. Test the unit according to its instructions before clinical use. | Perform routine cleaning, inspection, and maintenance; remove the device from service if performance remains abnormal. |
Clinical note: A stable apex-locator reading should be interpreted together with the patient’s symptoms, canal anatomy, tactile feedback, and appropriate radiographic findings. Follow the device instructions and applicable clinical protocols.
DENTSPLY Maillefer - USA
5100 E. Skelly Drive, Suite 300
Tulsa, Oklahoma 74135
DENTSPLY Maillefer - Canada
161 Vinyl Court
Woodbridge, ON L4L 4A3
Toll-free in the U.S.:
1-800-924-7393
Toll-free in Canada:
1-800-263-1437
Toll-free in the U.S.:
1-800-924-7389
Toll-free in Canada:
1-888-336-8775