Learning apex locator use is less about pressing a button and more about controlling small clinical variables. A dry field, a stable file, and a clear canal create better conditions for measurement. This guide explains how to use an apex locator step by step, from access preparation to working-length confirmation. It also shows where readings can become unreliable.
Endodontist Dr. Richard E. Walton captures the principle clearly: “An apex locator is an aid to treatment, not a replacement for clinical judgment.” That distinction matters. The display may show a stable reading, yet an open apex, perforation, excessive moisture, or metallic restoration can distort the result. The device is helpful. It is not infallible.
A practical workflow begins with isolation and careful canal scouting. The file should move freely without binding. Its clip must contact clean metal, not a wet glove or restoration. Advance slowly, watching the changing signal rather than chasing a perfect number. Near the apical constriction, pause. Record the measurement. Then compare it with a confirming radiograph and the canal’s tactile feedback.
Small details matter.
I have found that beginners often trust the screen too quickly. That is understandable, but risky. A second reading may differ by a fraction of a millimeter. The difference can change cleaning, shaping, and obturation decisions. This introduction therefore treats apex locator use as a clinical process, not a shortcut. It combines device handling, biological awareness, and honest reassessment when the reading does not fit the canal.
How to Use an Apex Locator Step by Step?
An apex locator helps estimate the file’s position inside a root canal. Its main purpose is locating the apical foramen more accurately than tactile sensation alone. It does not replace clinical judgment or a confirming radiograph. In practice, I treat its reading as valuable evidence, not an unquestionable answer.
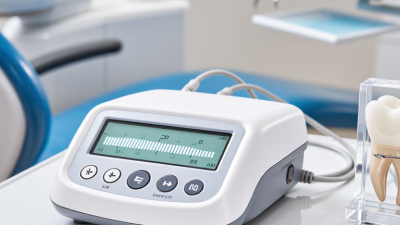
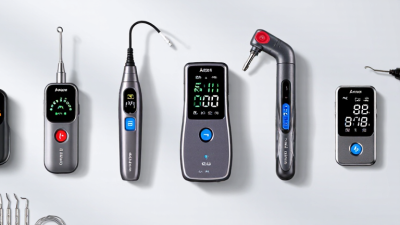
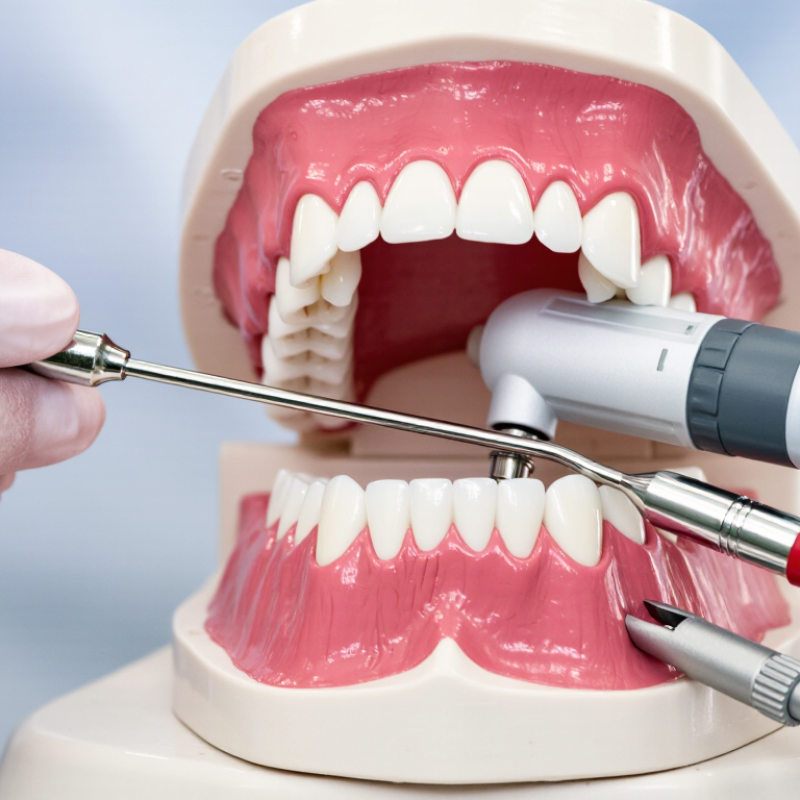
The basic components are simple: a display unit, measuring cable, lip clip, file clip, and electrode connection. Some devices also include a battery indicator and audible signals. Before use, inspect the cable and confirm a stable power supply. Place the lip clip gently against the patient’s lip. Attach the file clip to a clean endodontic file. Dry the access cavity carefully, but avoid drying the canal completely. Dry is not empty.
Advance the file slowly through the prepared canal. Watch the display rather than relying only on sound. A changing reading may indicate fluid, contact with metal, an open apex, or an unstable connection. Stop when the measurement becomes consistent near the working-length mark. Remove the file slightly and recheck the reading. I still remeasure when the result seems unusually short or long. That extra check can expose a loose clip or an overly wet chamber. The device supports treatment decisions, but canal anatomy can remain unpredictable. Read slowly. Confirm clinically.
Accurate measurement begins before the file enters the canal. Review the medical history and explain the procedure in calm, simple language. Place the patient comfortably and use effective isolation, usually with a rubber dam. Saliva can interfere with electrical readings and reduce visibility. Remove caries, old restorative material, and loose debris. Create a clear access cavity with straight-line entry. Do not rush this stage.
The canal should be negotiable with a small hand file. Irrigate carefully, then avoid flooding the pulp chamber. Excess solution on the chamber floor may create a false pathway for current. Gently dry the chamber with a small cotton pellet, while keeping the canal slightly moist. A completely dry canal may also produce unstable results. Attach the lip clip securely and check that it contacts moist oral tissue. Small details matter.
Inspect the device, cables, and file clip before measurement. Confirm the battery, visible display, and connection points. Select a file that fits the canal without binding. Advance it slowly, watching for a stable apical reading rather than chasing every signal. Recheck the reading after slight file movement. If the value changes sharply, stop and investigate. The canal may be too wet, too dry, blocked, or connected poorly. I still repeat questionable measurements, because confidence is not evidence. Confirm clinical findings with other appropriate methods when anatomy appears unusual.
After creating access and locating the canal orifice, isolate the tooth with a rubber dam. Dry the chamber carefully, but keep the canal slightly moist. Extreme dryness or excess irrigant can disturb the reading.
Connect the lip clip to the patient’s lip, then attach the file clip to a small hand file. Ensure both cables are secure. The file must contact canal walls without binding. Advance it slowly toward the apical region. Watch the locator display rather than forcing the file. When the signal approaches the apical endpoint, withdraw the file slightly and record the length from a stable coronal reference point. The working length usually ends near the apical constriction, not beyond the foramen. Confirm the electronic reading with tactile feedback and, when indicated, a radiograph. Electronic measurements are helpful, but they are not infallible.
Tips: Use a file that fits the canal. Clean the file before measuring. If the reading jumps, check the lip clip, file contact, and moisture level. A metal crown or leaking restoration may interfere. I sometimes repeat the measurement after shaping the coronal third; the result can change slightly. That is worth questioning, not ignoring. Record the reference point, file size, and final length in the treatment notes. Avoid pushing the file past the endpoint, especially in a narrow or curved canal. Small adjustments protect working length accuracy.
| Step | Procedure | Clinical Purpose | Expected Finding or Action | Important Precaution |
|---|---|---|---|---|
| 1 | Review the preoperative radiograph and assess the tooth for restorability, canal anatomy, curvature, and possible complications. | To estimate canal length and identify anatomical or procedural risks before measurement. | Select a suitable file size and establish a preliminary estimate of the working length. | An electronic measurement does not replace radiographic and clinical assessment. |
| 2 | Explain the procedure, obtain appropriate consent, and isolate the tooth with a rubber dam. | To maintain asepsis and prevent contact between irrigants, saliva, and oral tissues. | The tooth is dry enough for measurement and the working field is protected. | Avoid measuring through metallic restorations or other conductive pathways when possible. |
| 3 | Prepare the access cavity and locate all canal orifices. Remove loose pulp tissue and debris from the chamber. | To create a clear, straight-line path for the file and reduce measurement interference. | The file can enter the canal without binding at the chamber entrance. | Do not force instruments into a calcified or obstructed canal. |
| 4 | Connect the lip clip to the designated socket on the apex locator and attach the file clip to the endodontic file. | To complete the electrical circuit between the oral tissues and the file. | The device powers on and displays its normal starting screen or circuit status. | Check that cables and clips are clean, dry, intact, and firmly connected. |
| 5 | Select a small stainless-steel hand file that fits loosely in the canal, commonly a size 10 or 15 file when appropriate. | To allow the file to advance apically while maintaining contact with the canal walls. | The file progresses smoothly without excessive resistance or wedging. | File selection depends on canal diameter, curvature, patency, and clinical conditions. |
| 6 | Place the file in the canal and connect the file clip to the file shaft above the rubber dam. | To begin electronic measurement while maintaining a stable electrical connection. | The display responds as the file advances through the canal. | Prevent the file clip from touching the lip clip, metal restorations, or the rubber dam clamp. |
| 7 | Advance the file slowly with gentle watch-winding or short in-and-out movements while observing the display. | To locate the apical constriction or a clinically appropriate endpoint without pushing the file beyond the foramen. | The display progresses toward the apical region and becomes stable near the endpoint. | Stop if the file binds, the reading changes abruptly, or the patient experiences discomfort. |
| 8 | Identify the stable reading at the apical endpoint indicated by the device, then place the rubber stop at the selected coronal reference point. | To transfer the electronic measurement to a reproducible clinical length. | The file stop contacts the chosen reference point consistently. | The exact display symbols and endpoint guidance vary by device; follow the unit's instructions for use. |
| 9 | Remove the file, measure the file length with an endodontic ruler, and record the value for each canal. | To document the electronic measurement and establish the initial working length. | Working length is recorded from the selected coronal reference point to the file tip. | Use the same reference point throughout treatment unless it is changed and documented. |
| 10 | Confirm the measurement with a working-length radiograph when indicated, especially in complex anatomy or when the electronic reading is inconsistent. | To evaluate the file position relative to the radiographic apex and detect unusual anatomy. | The radiograph and electronic measurement are clinically compatible. | A radiograph may not accurately show the apical constriction or anatomic foramen in every case. |
| 11 | Recheck the working length after coronal enlargement, significant instrumentation, or a change in the canal's apical size or shape. | To maintain accurate apical control as canal preparation changes the file fit and electrical conditions. | The final working length is confirmed before shaping and obturation are completed. | Readings can be affected by fluid conditions, perforation, open apex, blockage, resorption, or an unstable file position. |
After opening the canal, create a stable glide path before connecting the file. Keep the canal moist, but avoid flooding the chamber. Attach the lip clip securely. Touch the file clip to a clean metal file. The display should change steadily as the file advances. A sudden jump often signals contact with a metal restoration, fluid pooling, or an unstable connection.
Read the display as guidance, not as an unquestionable answer. Many devices show bars, numbers, or words near the apical zone. The “apex” mark usually indicates the foramen, while the working length is commonly set about 0.5–1.0 mm short. Confirm the file position with a radiograph when anatomy is unclear. A systematic review in the Journal of Endodontics reported accuracy within 0.5 mm in roughly 90% of cases, depending on canal conditions and device generation. The American Association of Endodontists also recommends combining electronic measurements with clinical judgment and imaging. The display can look convincing. It can still be wrong.
Tips: Stop advancing when the reading becomes stable near the apical mark. Withdraw slightly and check whether the reading remains consistent. Recheck after irrigation. I still pause here. Curved canals, open apices, perforation, and excessive blood can distort the signal. If the reading changes repeatedly, dry the chamber, improve isolation, and repeat the measurement. Do not force the file. A small error at the endpoint can change cleaning, shaping, and obturation decisions.
After access preparation, irrigate the canal and remove debris from the chamber. Excess fluid can create unstable readings, while a completely dry canal may also reduce conductivity. Attach the lip clip securely, then place a small file into the canal. Advance it gently until the display approaches the apical signal. Do not force the file. A 2020 systematic review in the Journal of Endodontics found accuracy within ±0.5 mm commonly ranged from 80% to 95%, depending on anatomy and testing conditions.
Clean the file before recording. Wipe it with sterile gauze, confirm the stopper touches a clear reference point, and note the measurement in the clinical record. Record the tooth, canal, file size, reference surface, and irrigation status. Small details matter. Repeat the reading after withdrawing the file slightly, then advance it again. Consistent readings are more trustworthy than one perfect-looking number.
Verify the final length with clinical findings and, when anatomy is complex, an angled radiograph. Professional endodontic guidelines recommend combining electronic measurements with other evidence when resorption, open apices, perforation, or unusual curvature is suspected. My own weak point is rushing the second reading. That shortcut is easy to regret. A stable signal, clean file, and repeatable reference point provide stronger evidence than the display alone.
DENTSPLY Maillefer - USA
5100 E. Skelly Drive, Suite 300
Tulsa, Oklahoma 74135
DENTSPLY Maillefer - Canada
161 Vinyl Court
Woodbridge, ON L4L 4A3
Toll-free in the U.S.:
1-800-924-7393
Toll-free in Canada:
1-800-263-1437
Toll-free in the U.S.:
1-800-924-7389
Toll-free in Canada:
1-888-336-8775